Derusting door sills – How to remove rust from car sills correctly

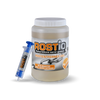
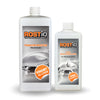
Door sills – often overlooked, but essential for the stability and safety of a vehicle. They connect the front and rear of the vehicle and contribute significantly to the torsional rigidity of the body. This makes it all the more critical when rust sets in – and unfortunately, it tends to do so. Door sills are a typical weak point, especially in older vehicles. Anyone who only wants to derust the exterior is making a serious mistake. In this article, we explain why comprehensive derusting, both inside and out, is essential and how you can combat rust permanently and inexpensively with ROSTIO products – the Rust Converter and ROSTIO 2 in 1 .
Why are sills particularly susceptible to rust?
Door sills are low, constantly exposed to splashing water, road salt, and dirt, and are difficult to see. Moisture penetrates through small stone chips, damaged paintwork, or invisible microcracks – and begins its destructive work.
Particularly dangerous: Rust usually develops from the inside out . This means that visible rust on the outside of the sill is often just the tip of the iceberg. On the inside, the rust has long since begun to erode the sheet metal – and in the worst case, endangers the structural integrity of your vehicle. Once it has progressed to this point, the only solution is to weld in a repair panel, which should be avoided. So, protect and treat, not weld.
Remove rust from car door sills – from the outside and inside!
Step 1: Visual inspection and diagnosis
Before you start derusting, a thorough visual inspection is required:
-
Are there brown rust bubbles in the paint?
-
Can soft spots be pressed in?
-
Has the underbody protection already burst under the car?
-
Does the vehicle smell slightly musty when it is damp?
If so, rust removal can no longer be postponed. But be careful: Working only on the outside isn't enough. The sill is a hollow profile—vast amounts of rust can hide inside.
Step 2: Remove rust from the outside of the sill
The outer rust is first removed mechanically. Depending on the severity:
-
Light rust film : Sand with sandpaper (P180–P240).
-
Heavier rust spots : Remove rust with a hand wire brush or ROSTIO fan-type discs / CSD discs.
-
Blisters and rust spots : Burst, open with a chisel or spatula and remove everything loose.
Important : Do not use rotating wire brushes on drills or angle grinders – they will only smear rust instead of removing it.
ROSTIO fan-shaped washers / CSD washers
Step 3: Rust conversion with ROSTIO rust converter
After the mechanical preparatory work, the chemical rust conversion is crucial – and this is where the ROSTIO rust converter comes into play:
Advantages:
-
Highly effective even against residual rust in recesses
-
Thin – penetrates well into pores and crevices
-
No need to wash
-
Can be painted over
Application:
-
Apply rust converter evenly to the rusty areas (brush or spray bottle).
-
Let it soak in – the rust will turn black.
-
Let dry for 24 hours.
The ROSTIO rust converter forms a stable iron-tannin layer and thus creates the perfect basis for further protective measures.
Directly to ROSTIO rust converter
Step 4: Rust protection inside the sill – the forgotten part
Many restoration attempts fail because the cavity in the side sill is left untreated. This is precisely where rust prefers to nest – and creeps back out from the inside.
Solution: ROSTIO 2 in 1 – Cavity Sealant-Rust Converter and Protection
This product has been specially developed for hard-to-reach areas:
-
Rust converter and cavity preservation in one
-
Displaces water – ideal for damp cavities
-
Creeps into the smallest cracks and folds
-
Can also be used with slight residual moisture
Application:
-
Create access: Either through existing cavity openings or by deliberately drilling small holes (e.g. behind plastic covers).
-
Spray ROSTIO 2in1 with a cavity probe – generously, including into the folds and overlaps.
-
Wipe off any excess product at the exit points.
Tip: Perform an endoscope inspection or use transparent probes with a return container to ensure that the product reaches everywhere.
Optional: Reinforced protection with primer and varnish
After successful rust transformation outside, it is recommended to build up the surface as follows:
-
Epoxy primer (e.g. ROSTIO Epoxy) – for maximum adhesion and sealing.
-
Rust protection paint (e.g. ROSTIO synthetic resin paint) – provides long-lasting protection and visual enhancement.
-
Underbody protection or stone chip protection – apply to particularly vulnerable areas.
Directly to ROSTIO Epoxy Primer Directly to ROSTIO synthetic resin varnish
Summary of the most important steps
| Step | measure |
|---|---|
| Visual inspection | Detecting rust inside and out |
| Mechanical removal | Sand, scrape, expose rust |
| Rust transformation outside | Use ROSTIO rust converter |
| Rust conversion + interior protection | Insert ROSTIO 2in1 in the sill cavity |
| Exterior paint structure | ROSTIO epoxy primer + rust protection paint + stone chip protection |
Why derusting alone is not enough
Many vehicle owners experience déjà vu: Freshly derusted, repainted – and after a winter, the rust is back. Why?
Because:
-
The interior was not treated
-
Moisture continues to penetrate
-
No permanent protective layer has been built up
-
Rust simply continues to work under the paint
Therefore, a holistic approach is essential – including mechanical removal, chemical conversion and permanent sealing.
Typical mistakes when derusting sills
❌ Just sand and repaint
❌ No view into the cavity
❌ No cavity sealing
❌ Do not allow products to dry completely
❌ Use of products without creep ability
Conclusion: Only those who go deep win
Rust removal from door sills is more than just cosmetic. It's about substance, safety—and ultimately, maintaining the value of your vehicle. Sanding and painting only the exterior only addresses the symptoms, not the cause.
With ROSTIO Rust Converter and ROSTIO 2in1, you have two professional tools at your disposal to systematically combat rust – both inside and out. Don't forget the cavities, crevices, and hidden corners. This is the only way to ensure that rust doesn't stand a chance.
Final tip:
If you want to be on the safe side, you should perform an annual visual inspection of the sills (including the inside using an endoscope or through cavity openings) – especially after winter. This can help avoid high and unnecessary costs.


